
What is a backup
Backup refers to the copying of the data (files and folders) to a secondary location to protect and secure the data from unknown events like theft, malicious attacks, or hard disk failures.
Regular iPhone backup should be done to avoid a sudden loss of data as the files and folders can be restored at any time if an updated backup is available.
Why you should you make an iPhone backup
It’s very painful to start over when you lose your phone or while moving to a new phone from an old one, and that is where backups are important … and the process of taking backup on the iPhone is not at all hard.
When you create a backup, all the iPhone data, including settings, apps, contacts, messages, and photos are saved to a new location (a computer or external drive, for example).
Also, Apple releases a good number of iOS updates every year to keep the iPhone software update, and it is recommended to take a full backup of the iPhone before installing any updates, just in case something goes wrong.
So the backup is essentially a safety net for your iPhone.
How to securely back up your iPhone data

How to backup your iPhone securely
There are many methods available to back up the iPhone data in which backup using pCloud and iTunes are the most popular ones.
All of these backup methods are easy and free to use. You can start the backup and then set up the automatic sync to keep the backup updated at all times.
Apple’s iCloud is also very popular, but Apple only gives 5 GB of free storage, and most of the phones now have a lot more data … so users prefer other methods over iCloud sync.
Also, to be sure, you should have two copies of the backup at different locations (in pCloud and iTunes, for example) so that if somehow your primary backup gets corrupted, you can restore the data from your second backup.
Unlike phone and cloud backups, desktop ones are a little time consuming as you will have to keep your device connected to your computer until the backup completes.
1. iPhone Backup using pCloud
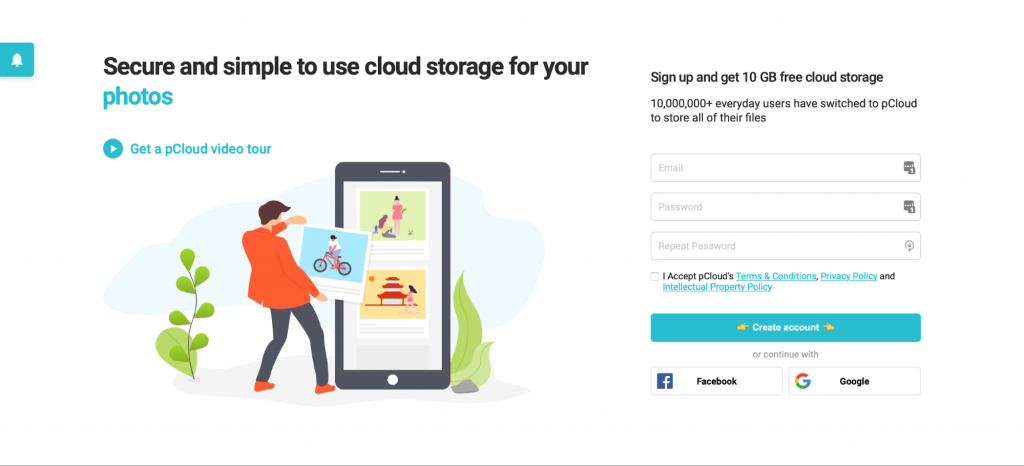
pCloud is a cloud storage provider with a very easy-to-use service that offers up to 10 GB of free cloud storage and lifetime plans of up to 2TB at a very nominal rate.
pCloud
This cloud storage makes storing files and backups easier as compared to other methods as pCloud structure is designed to keep all the data secure and easily accessible to the user.
pCloud is one of the most secure cloud hosting storage providers with TLS/SSL channel protection, 256-bit AES encryption for all files and pCloud stores five separate copies of your data on different server locations to maximize the security of your data. Two-factor authentication is also available in pCloud to stop the hackers even in the case of password leaks.
But even with all these security features, there is pCloud Crypto, which is a paid add-on to provide an extra layer of protection using client-side encryption. You can try pCloud free for 14 days and then decide if it’s worth it for you or not.

pCloud Crypto
With pCloud crypto, the pCloud desktop or mobile app first encrypts your data, and then the data is sent to their cloud storage locations. And only a CryptoPass key can be used to unlock the data.
Steps to take a backup of your iPhone using pCloud…
- Firstly, download the pCloud app on your iPhone from App Store.
- Tap on More and then tap on Automatic Upload in the settings.
- Again tap on Automatic Upload to turn this on.
- Now select the option according to your choice to start the backup of your data.
After turning on the Automatic Upload feature, all the photos and videos of your iPhone will be backed up in your pCloud account automatically.
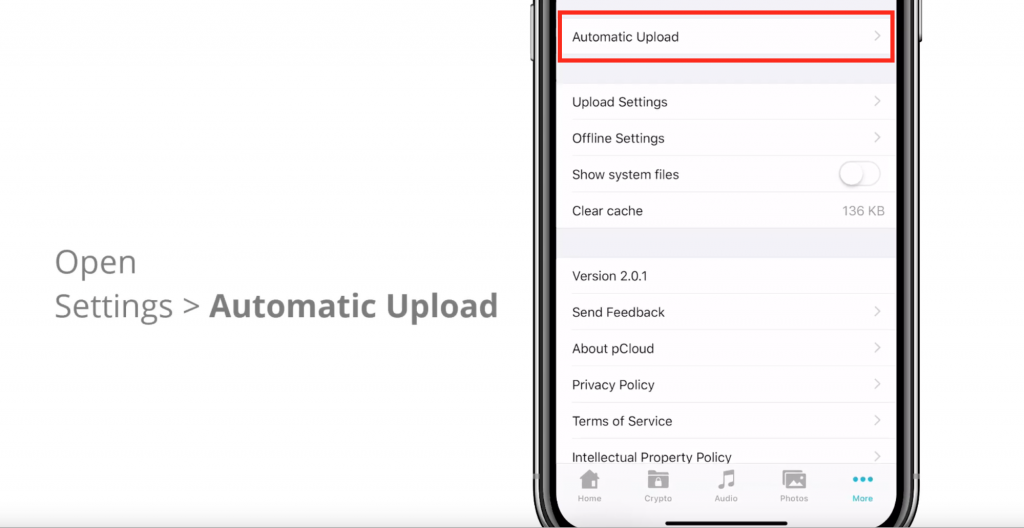
Automatic Upload feature in the Settings
The quality of data upload can also be changed in Settings > Upload Settings > JPEG or Original.
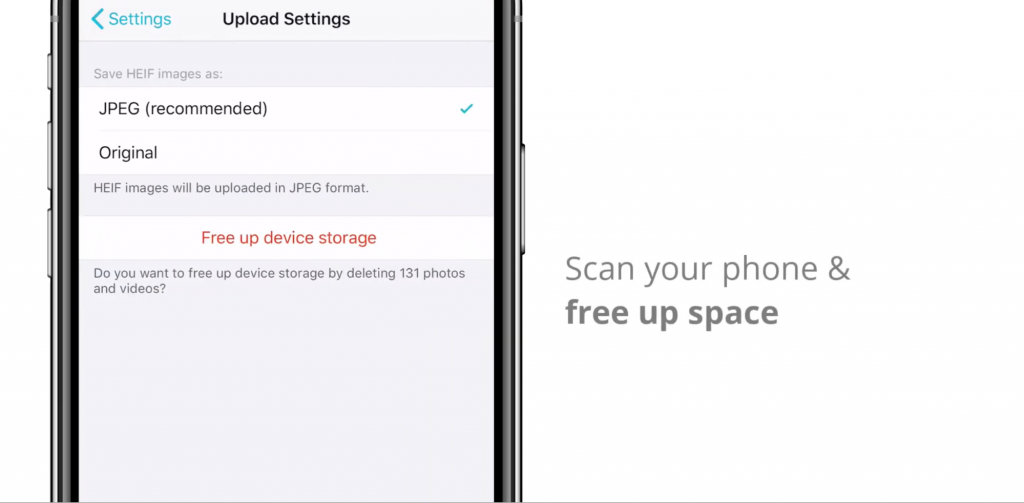
Upload settings to change the quality of data uploaded
pCloud also has some interesting features like pCloud Rewind that tracks all your files and folders for 30 days so that if you accidentally delete any of your data, you can restore that quickly using the Rewind feature. You can extend to up to 360 days of file history just in case you are working on some very long term projects.
You can backup your photos and videos from social media platforms also such as Facebook and Instagram, and keep your memories secure in the cloud. The automatic backups once set up will be done every 7 days, starting from the date of your initial backup. If you want to stop the backups, you can do so by going to my.pcloud > Backups in the left menu > and select the backup you want to Stop.
One of the best things about pCloud is its lifetime subscription plan, where, for a one-time payment of $175, you will get lifetime storage of 500 GB, and for $350 one-time payment, you will get 2 TB storage.
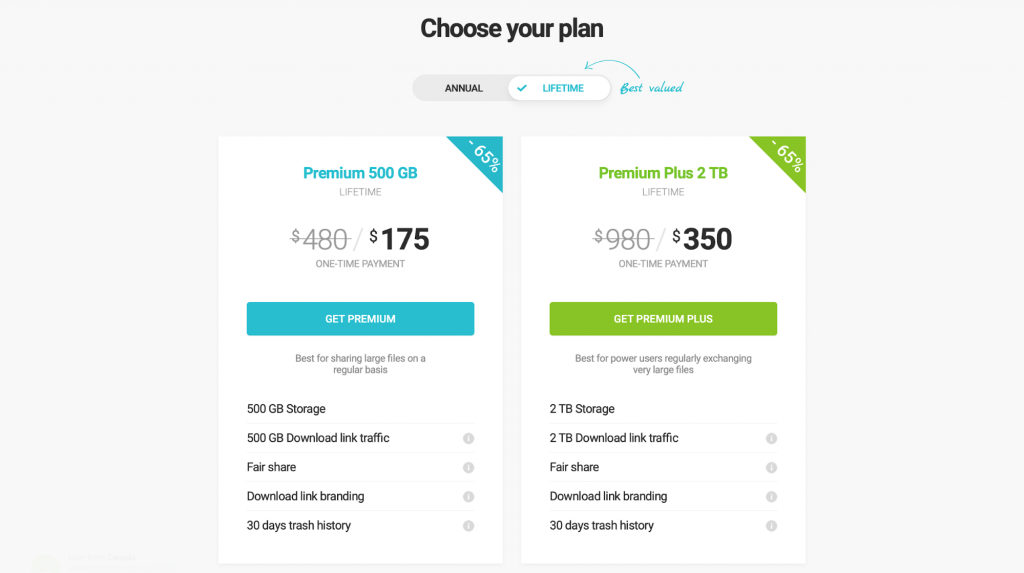
pCloud lifetime pricing plans
Monthly plans of pCloud starts from $4.99 per month for 500 GB and $9.99 per month for 2 TB, while with an annual plan it only costs $47.88 annually ($3.99 per month) for 500 GB and $95.88 annually ($7.99 per month) for 2 TB.
2. Backup using iCloud
With the iCloud backup option, you can securely transfer all your iPhone data to iCloud and restore the data any time should you need it.
The iCloud backup can be set to both automatically or manually.
With iCloud backup, all the photos, settings, apps, messages, etc. are safely saved in the iCloud. The iPhone backup option also backup purchase history of music, apps, books, etc. which can be restored easily.
As iCloud syncs all the data automatically, you don’t have to worry about backups, and you don’t even need any cable or your computer for iCloud backups.
Steps to take a backup of the iPhone using iCloud…
- Connect your iPhone to a WiFi network first.
- Go to Settings > [your name] > and then tap on iCloud. If you are on iOS 10.2 or earlier, go to Settings, scroll down and tap on iCloud.
- Tap on iCloud backup to turn on the backup.
- Tap Backup now and stay connected to the WiFi network until the backup process gets completed.
To make sure that the backup process is done, again, go to Settings > [your name] > iCloud > iCloud storage and then tap on Manage storage. The completed backup will appear with the time and size details in the device tab.
You can also set up automatic iCloud backups on regular intervals to always keep your device backup updated.
Steps to automatically create a backup with iCloud are as follows…
- First, make sure that the iCloud backup is turned on in the Settings > [your name] > iCloud > iCloud Backup.
- Now connect your device to a power source and WiFi network.
- Make sure that your iPhone screen is password protected.
- Check that you have sufficient storage available in the iCloud for the backup process to complete.
By default, every iCloud account gets 5 GB of free storage, but if you need more storage, you can buy more with plans starting from 50 GB at $0.99, 200 GB at $2.99, and 2TB at $9.99 per month.
To manage your iCloud space, you can go to Manage storage, and there you will find a complete list of apps that are consuming the storage space. You can delete the unnecessary items to keep the iCloud clean.
One drawback of iCloud backup is that there can be only one backup at a time, and no history of backup is retained, so if you want to restore your iPhone to the backup of a week ago, it’s not possible.
To restore your backup from iCloud, you will have to do it by resetting your iPhone as there is no straightforward method to restore all the data. So to restore, go to the Settings > General > tap on Reset and then select Erase All Content and Settings.
iPhone will ask for the lock screen password and iCloud password to finish the resetting process.
Once the reset is complete, iPhone will restart, and you will then have to sign in again into your iCloud account. Then select Restore from iCloud Backup option when prompted to restore the backup. You will be presented with a list of backups with date and time mentioned, select the one you want to restore, and the iPhone will begin restoring the backup.
When finished, you’ll be asked again to enter your iCloud credentials to update all the settings, including Apple Pay. Once all of this is done, the home screen with all the apps will appear with other data such as photos, contacts, call history, and messages.
3. Backup using iTunes
This method is also very popular as iTunes backup is the oldest backup method … and backing up iPhone to iTunes is easy.
All you have to do is plug your iPhone to your Mac or PC with iTunes, and from the iTunes overview page, click on the Back up now button to start the backup manually.
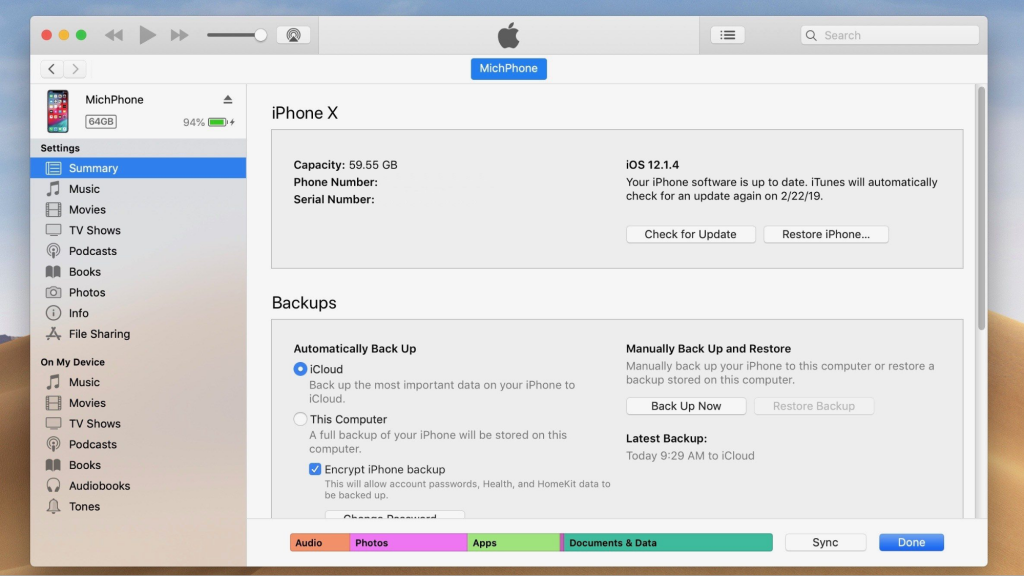
iTunes to backup the iPhone
But iTunes backups aren’t automated, and you will have to manually connect your iPhone to your computer every time you want to back up the device.
iTunes backup works a little different from the iCloud one as iTunes backup includes everything from photos, media files, settings, memos, apps, calendars, bookmarks, etc.
As it’s a complete backup, if your iPhone is lost or damaged, you can quickly restore all your data to your new phone without any problem.
Steps to backup your iPhone using iTunes…
- Connect your iPhone to your computer.
- Open iTunes on your Mac or PC. You can download iTunes from the Apple site if you are on a Windows computer.
- The device may ask for a passcode or Trust This Computer, where you can follow the onscreen steps.
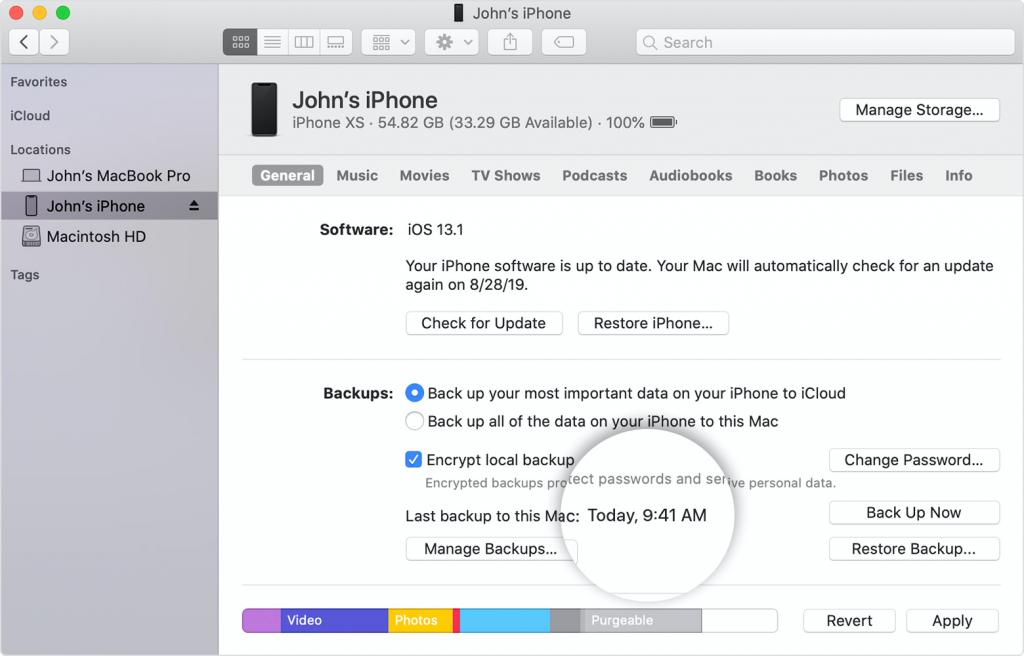
- Now, if you want to encrypt the backup of your iPhone, you will have to create a password so that it can be used while restoring it.
- When the backup process ends, you can check the Last backup time to make sure that the latest backup is done securely.
A backup on your computer doesn’t include it…
- Touch ID or Face ID settings
- Apple mail
- iTunes and App Store content
- Data stored in iCloud such as photos, messages, etc.
- Activity, keychain and health data (you will have to use encrypted backups to backup this data)
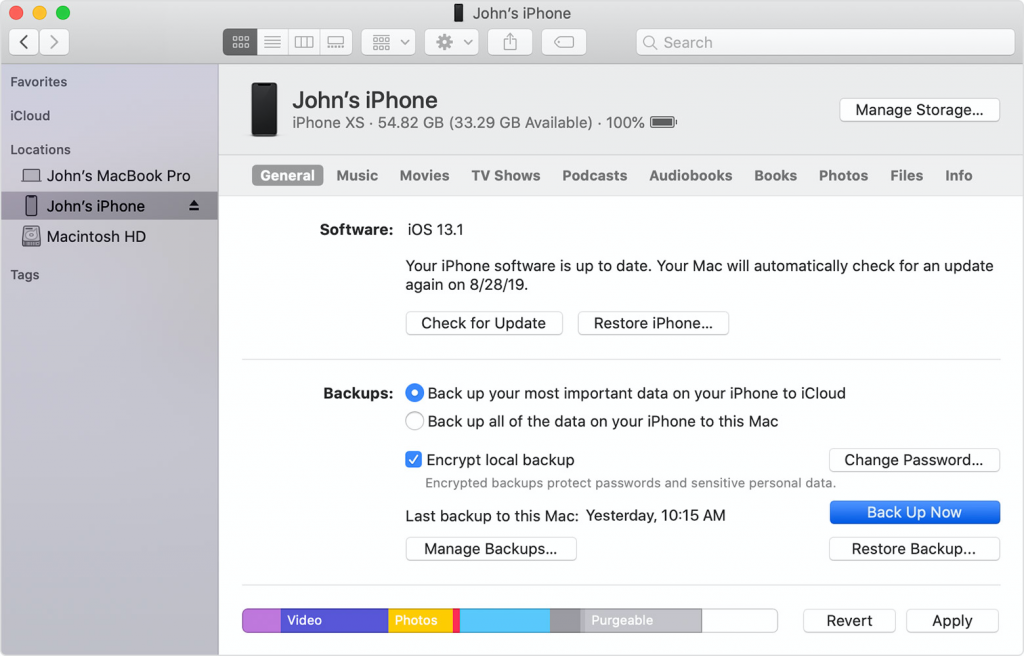
Backup your iPhone in macOS Catalina…
For now, all the backup and related tasks are handled by iTunes, but with the latest release of macOS Catalina, iTunes will be officially gone on the Mac, and all the responsibilities of iTunes for the backup will be handled by the Finder only.
But the process is still almost the same as before, and all you have to do is use Finder instead of iTunes.
- Connect your device to the Mac and launch Finder.
- Select your device from the list on the left side of the screen.
- Click on the General tab and then select Back Up Now.
If you have a Mac and you use Time Machine, then it can get you an extra layer of protection as the iPhone backup is again backed up by the Time Machine on the Mac.
Encrypted Backups
The internet is not safe nowadays from hackers, and there are multiple cases in the past, which shows that either through technical failures or human errors — even the data stored in iCloud can be accessed by hackers.
iCloud is considered secure, and Apple always positions them as one of the most secure platforms, but there have been multiple cases where photos and other data were leaked.
And this is why third-party methods are recommended as they provide much better security. Like the pCloud crypto feature will keep your backup secure from everyone except you. You will be able to access your backup in pCloud with the key only, and even the pCloud team cannot access your encrypted data.
Even if anybody intercepts your data on its way to cloud storage, it will be useless as the data can only be viewed with the key used at the time of encryption.
You can also encrypt your backup in iTunes and Finder (in Mac). Encrypted backups also contain data like your saved passwords, health data, WiFi settings, and website history.
The backup isn’t encrypted automatically, so to encrypt your data; you will have to turn it on in the Finder or iTunes first.
Note The password of your encrypted backup act as a key, and if somehow you forget or lose that key, then there is no way to recover your backup. So, keep the password (key) of your backup secure.
But if you don’t remember the password of your encrypted backup, then you can make a new backup of your device by resetting the password.
So, which backup method is best for you?
A quick comparison to help you decide…
| pCloud | iCloud | iTunes |
| Stores backups in secure Cloud storage. | Stores backups in iCloud. | Stores backups on your PC or Mac. |
| Offers the first 10 GB for free and up to 2 TB of lifetime storage space. | Offers only 5 GB of free space with monthly subscriptions to extend the space. | Storage depends on your PC or Mac available space. |
| Offers the best in class crypto service to encrypt all the data. | Encrypts your backups by default. | Offers encrypted backups. |
| You can create your backup from anywhere with WiFi. | Backups can be created from anywhere with a WiFi connection. | Connection using a cable is required to create or restore the backup. |
If you are confused about which method will work best for you to backup your iPhone securely, our recommendation is to go with pCloud as your primary backup option and iCloud as the secondary one.
You can also try backing up your data in any third-party apps like Dropbox, Drive, and OneDrive. All of these have auto-sync feature and keep your data secure (though not as secure as pCloud does) and you these will not interfere with your iCloud data.
The Conclusion
With iPhone backup using pCloud, your iPhone data will be safe and secure, and you can recover the data in the case of theft, loss, or phone transfer.
And while iCloud and iTunes sync backup the data, pCloud keeps your data secure, which cannot be hacked by hackers.
You might also like
Nothing found.